Anvil Workflows combine all elements of digital paperwork and serve as a complete paperwork solution- gather data through Webforms, fill PDFs, and collect signatures.
While Workflows are an incredibly powerful tool that can help you automate your paperwork processes end-to-end, getting started with the Workflow editor dashboard can be overwhelming.
We’ll help ease you into the Workflow building process by walking you through the Workflow editor.
Workflow editor overview
Generally, an Anvil Workflow consists of three parts:
- A Webform to collect information
- A PDF where the information is filled
- A signature on the completed document
The Workflow editor includes separate areas to configure all parts of your Workflow. After you’ve navigated to your Workflow editor, watch the video below to learn more about how use the Workflow editor:
Webform editor
The Webform editor allows you to make changes to all Webforms within your Workflow. You can use the Webform toolbar to navigate between Webforms. If you want to make changes to specific Webforms, use the Webform editor panel instead.
To learn more about formatting your Webform, please see our video tutorial.
Webform toolbar
The Webform toolbar is found just above the preview of the Webform.
 The Webform toolbar allows you to edit Webforms within a Workflow.
This toolbar allows you to:
- Add or reorder Webforms in your Workflow.
- Toggle between test and build mode.
- Undo and redo actions.
To learn how to add multiple Webforms to a Workflow, please see this article instead.
Webform editor panel
The Webform editor panel is found to the left of the Webform preview. By default, this panel contains settings that affect your overall Webform, such as its name and access controls.
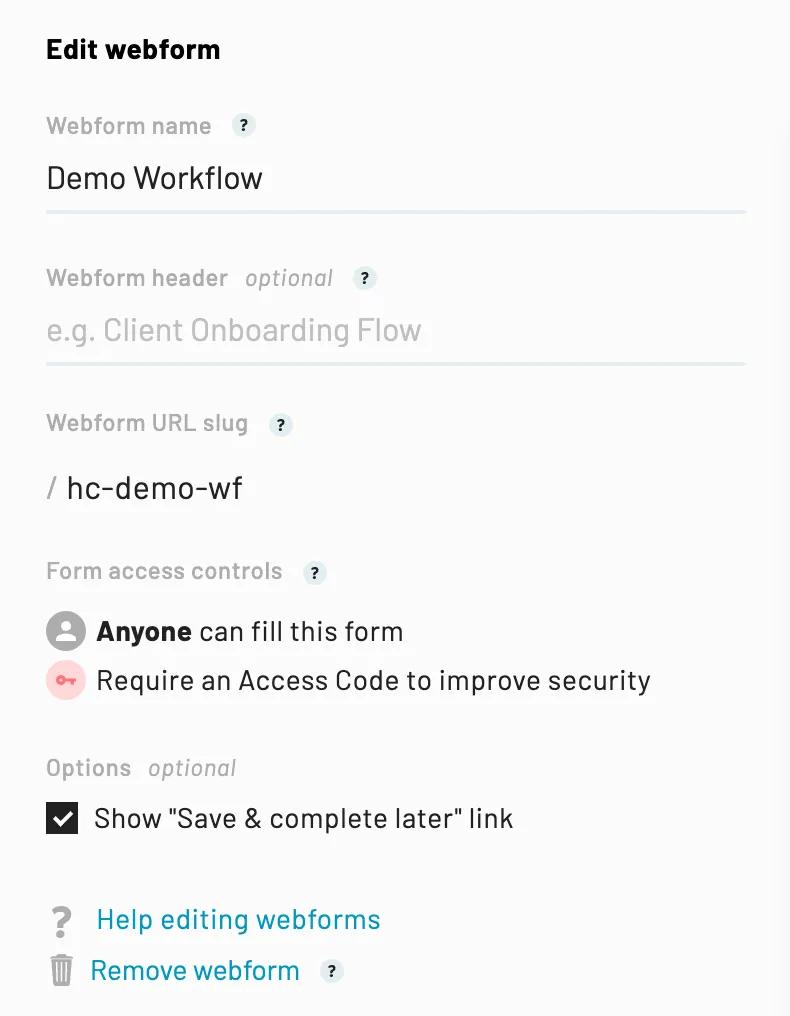 The Webform editor panel allows you to edit the selected Webform.
The Webform editor panel allows you to:
- Rename your Webform or update your Webform URL slug.
- Edit your Webform header or remove it altogether.
- Set up access control* to add more security to your Webform.
- Add additional Webforms from your Workflow.
- Remove your Webform altogether.
* Please note that access control is an Custom plan feature.
The Webform editor panel will automatically change to display the field or page editor panels when you select a specific Webform field or page. This allows you to manage the settings of the selected field or page.
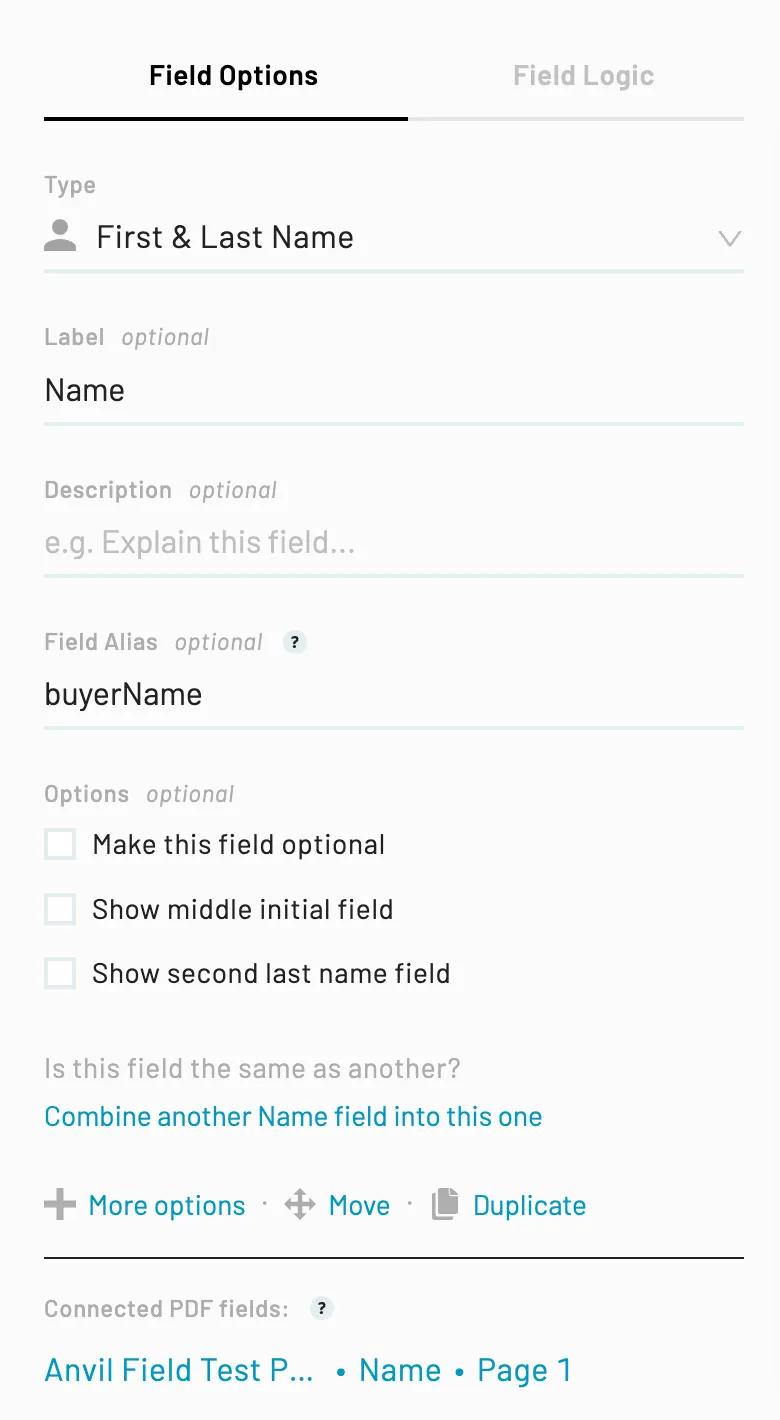 The Webform field editor panel allows you to edit the selected field.
The Webform field and page panels allow you to:
- Add logic to a field or page to control when a field/page is shown/not shown to users.
- Add a default value to a Webform to help pre-fill information for users.
- Add and format explanation text to create guided experiences for your users.
- Remove or reorder your Webform fields to streamline your Webform.
- Assign field aliases to easily reference data and simplify mapping across systems.
PDF editor
The PDF editor allows you to make changes to all documents within your Workflow. You can either use the PDF editor toolbar to navigate between documents, or use the PDF editor panel to make changes to specific documents.
Note: Changes to documents within your Workflow only apply to the Workflow. If you want to make changes to the PDF template, please see this article instead.
PDF toolbar
The PDF toolbar is found just above the document preview.
 The PDF toolbar allows you to edit documents within a Workflow.
This toolbar allows you to:
If you want to learn how to add multiple PDFs to a Workflow please see this article.
PDF editor panel
The PDF editor panel is found to the right of the document preview. By default, this panel contains settings that affect your overall document, such as its name and downloaded file name.
You can also access the Signer editor in the main PDF editor panel.
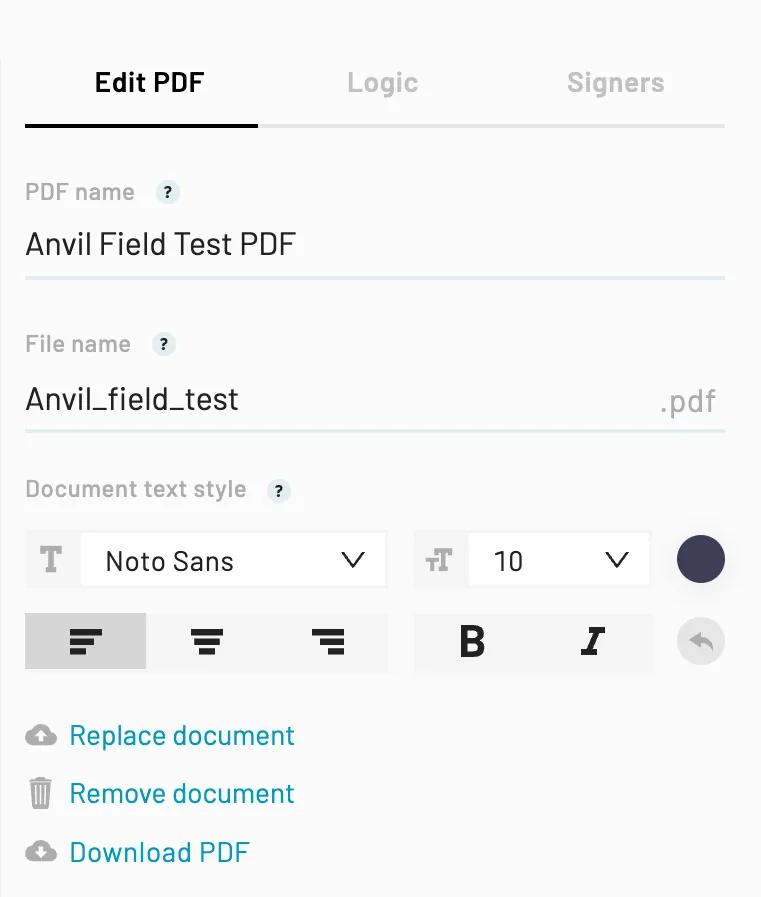 The PDF editor panel allows you to edit the selected document.
The PDF editor panel allows you to:
- Rename your PDF or the file name that’s displayed when the document is downloaded.
- Adjust overall document formatting settings like font family, size, and color.
- Add PDF page logic to determine when the selected PDF will be included in the final document packet.
- Quickly replace the underlying document whilst preserving all PDF fields and Webform field connections.
- Remove the PDF altogether from your Workflow.
The PDF editor panel will automatically change to display the field editor panel when you select a specific PDF field. This allows you to manage the settings of the selected field or page.
Any changes you make to individual fields can also be applied to multiple fields in bulk with the multi select tool. Such as: connecting PDF fields, renaming fields, aligning fields and more.
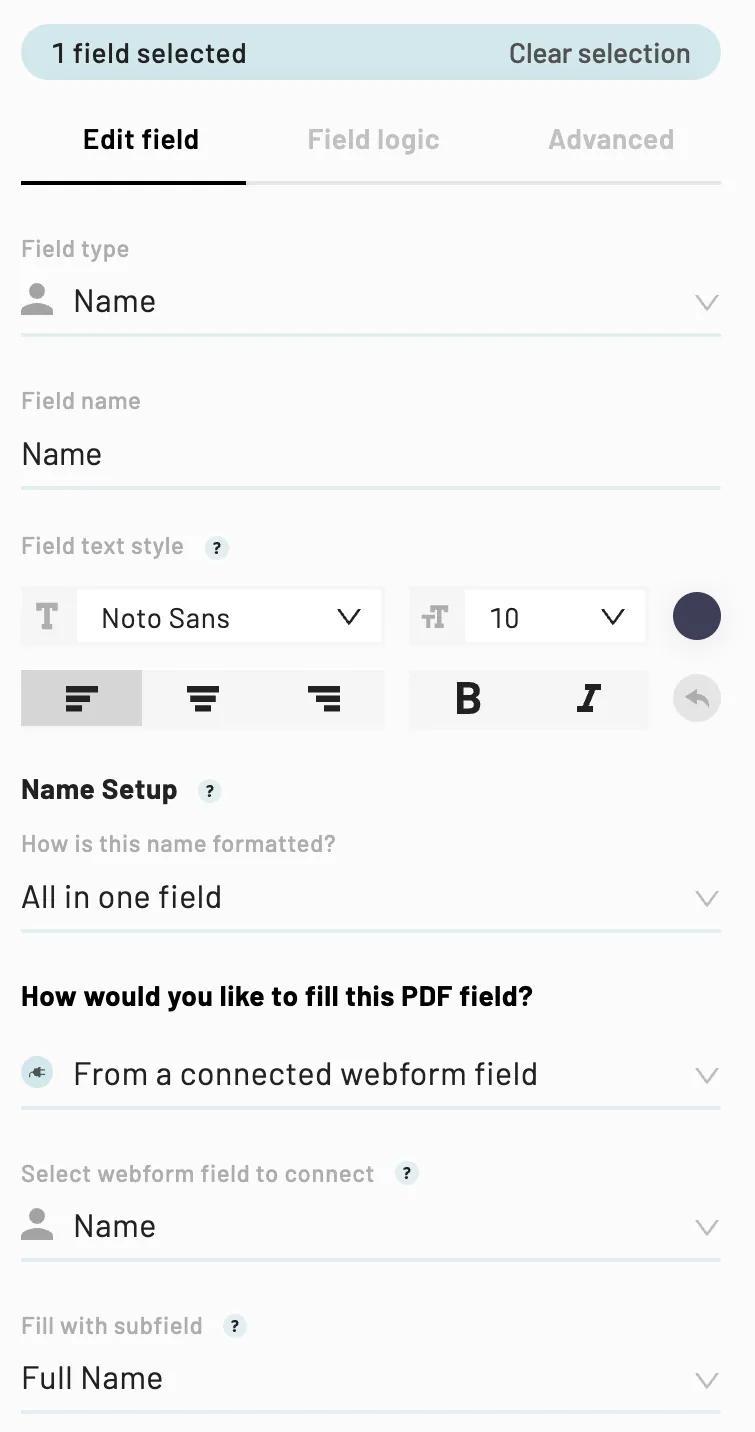 The PDF field editor panel allows you to edit the selected field.
The PDF field editor panel allows you to:
- Add or remove new fields from your document.
- Update the type of a PDF field.
- For a full list of supported field types, please see our glossary.
- Determine whether PDF fields are filled with in information from the Webform or with a literal value.
- Configure multiple documents to be completed with the same piece of information.
- Add field logic to dynamically determine when a field is filled in.
Signer editor
The signer editor allows you to add, remove, and manage signers.
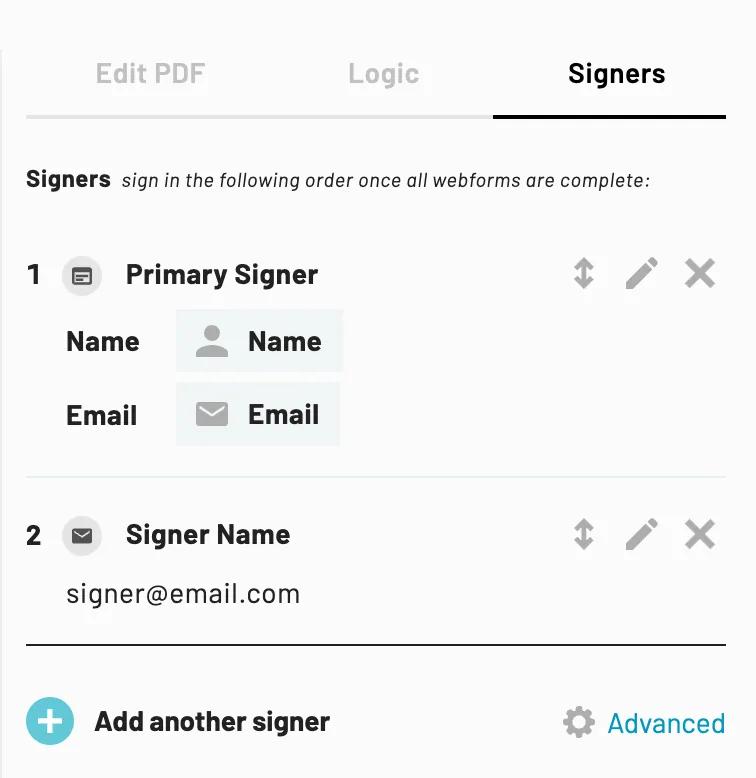 The Signer editor allows you to manage signers.
The signer editor panel allows you to:
- Add new signers or remove existing signers.
- Edit existing signer settings.
- Disconnect signers from specific signature fields.
- Skip specific signers by adding conditional signer logic.
- Change a signature field format to collect a signature date or initials instead.
- Set signer options and types to determine how and when signers are asked to sign.
- Reorder signers to change the signing order or set them to sign documents progressively.*
* Please note that progressive signing is an Custom plan feature.
Workflow settings
The Workflow settings page allows you to make changes to your Workflows’ settings.
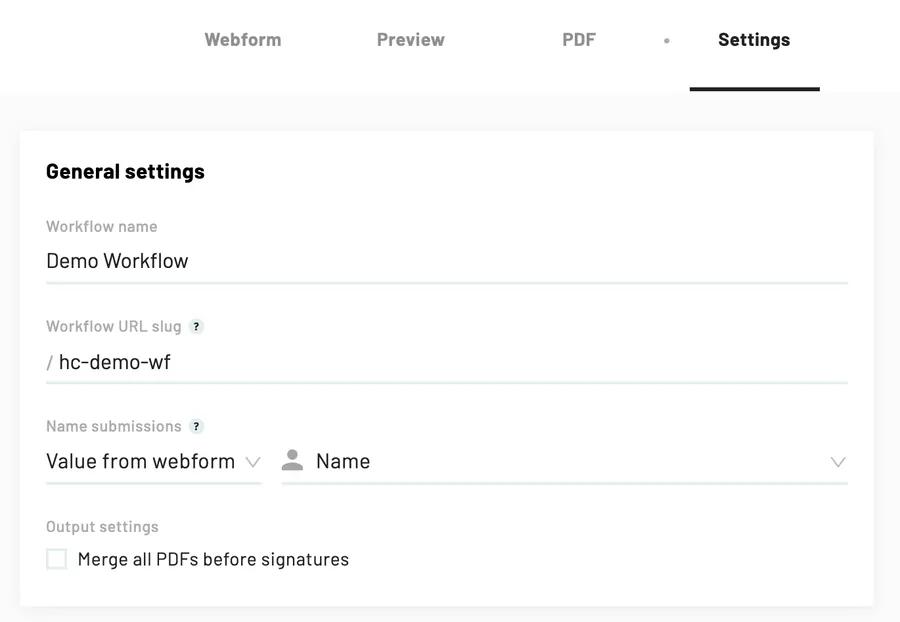 The Workflow settings page allows you to manage your Workflows' settings.
The Workflow settings page allows you to control:
- General settings
- The name of your Workflow and your Workflows' URL slug.
- The name of each Workflow submission as you want it to appear on your dashboard.
- Whether or not you want to combine all documents into one file before collecting signatures.
- Signature settings
- Customize the subject and body of signature emails that notify a signer when it's their turn to sign.
- Signature provider.
- White label settings*
- Link a custom CSS stylesheet to integrate Anvil Workflows seamlessly into your product.
- Automatic Workflow locking*
- Lock the entire Workflow to prevent submissions after a designated time.
- Automatic submission locking*
- Lock submissions after a designated time has passed since the submission was started.
- Email Notifications
- Determine who will be notified each time a Workflow is completed.
- Opt in/out of notifications for test Workflow submissions.
- Access the Workflow Embed link
- Copy your Workflows' embeddable iframe code to embed the Webform filling experience in your own application or site.
* Please note that these features are Custom plan features.